Sunday 20 April 2014

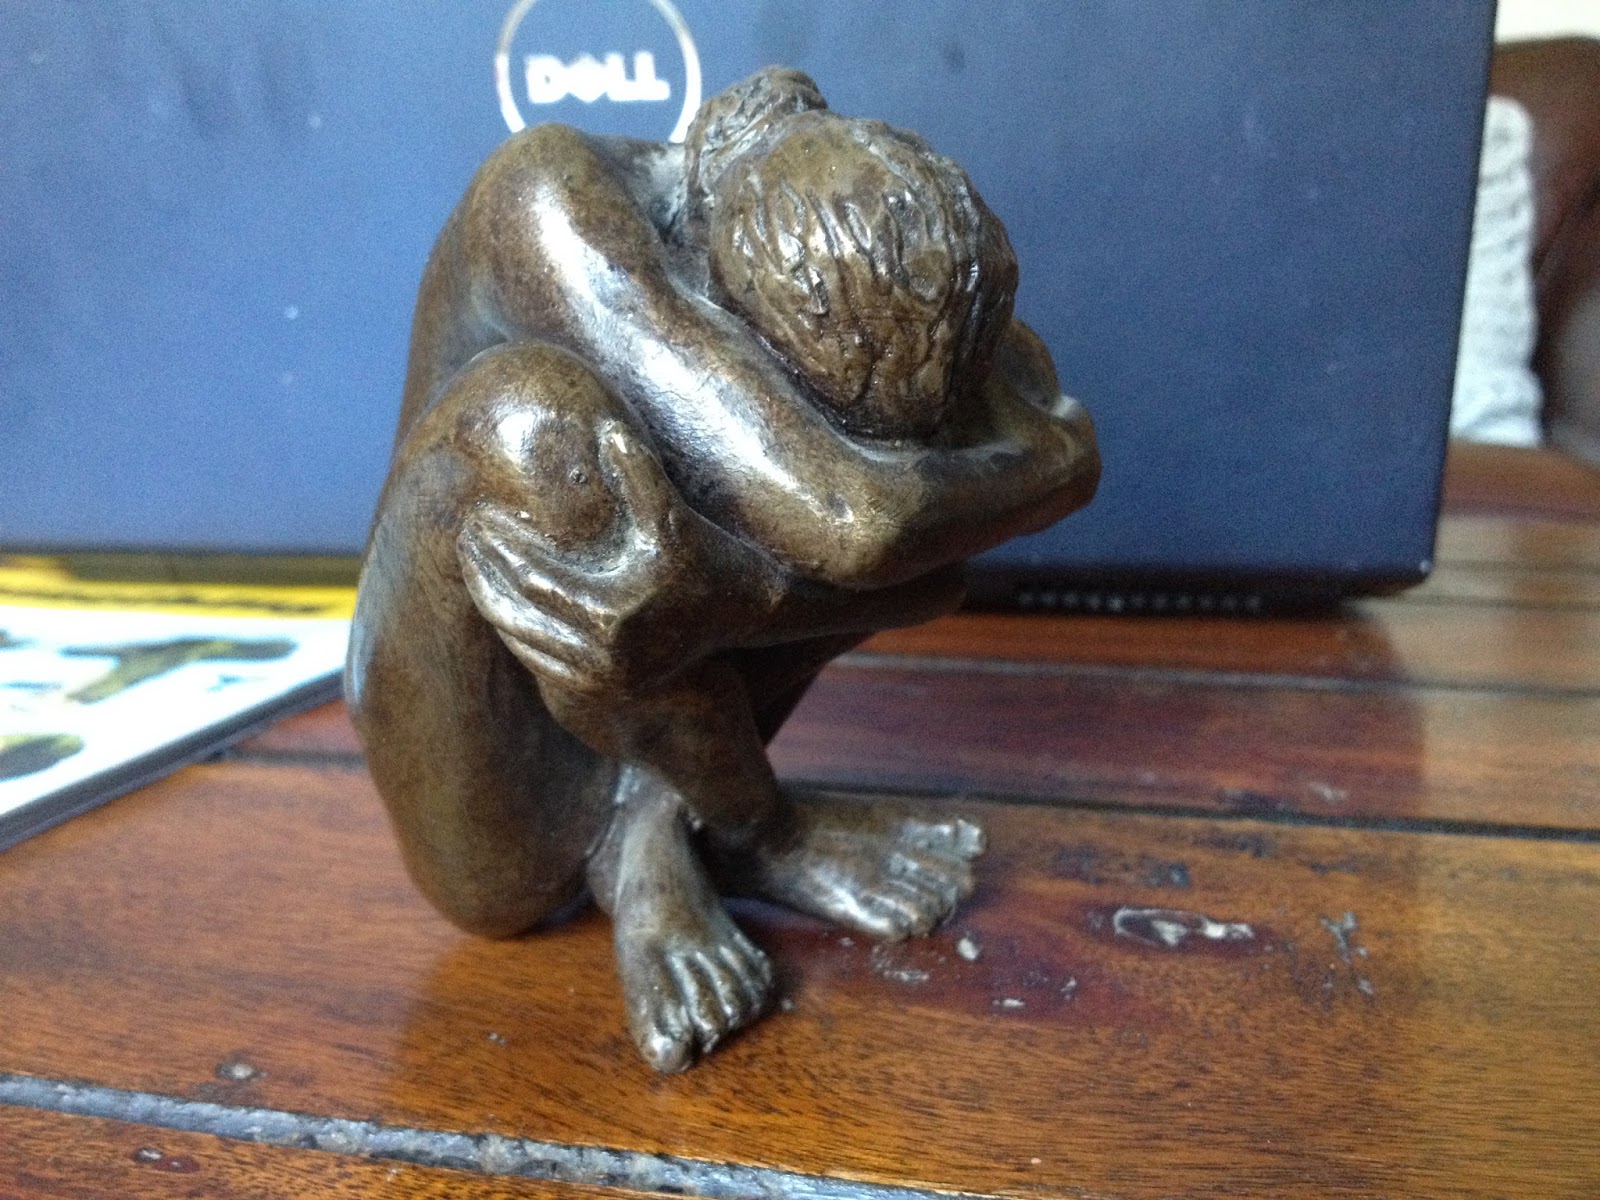
Crouch

I have a good friend who we visited recently, who has many fine pictures and sculptures in her house, many of them art nudes. One small sculpture on her mantelpiece caught my eye as it looked both original and printable.


Here is the STL file, processed in the usual way, ready for printing.


I used Cura for the slicing, both for its support and ability to fix overlapping meshes (Project Miller has now ceased to function!)
I decided to print in black ABS and use vapour smoothing on the finished print. This version was printed inside the heated chamber at a slow 25 mm/s and 235C. 
There is one small split across the back which I hope will improve with acetone treatment.

Before support removal


After support removal


I have another project in the pipeline (well, in the printer actually), so I'll wait until that's finished and then start a smoothing session on both of them.


Saturday 29 March 2014

Contact

How about this amazing pose in another photo I found on Pinterest
It appears to have come from the Raw Moves collection by photographer, James Houston.

I love the point of contact of the feet, which reminds me of some of the abstract works of Henry Moore or Jean Arp.


I think it will print OK. I'm just not sure how well it would translate into a female pose. 


What do you think?


Well, I had to give it a go, didn't I! As it turned out, getting the pose right was the easy part. I increased the muscle tone a bit and shaped the breasts into a position that suggest they are hanging in the correct direction.
Finding a way to actually print the model proved much more challenging.

Here is a view of the model in MeshLab.


The biggest problem was the contact point of the two big toes - I just knew that the tiny point of contact would be incapable of supporting the weight of the top leg growing upwards above it without breaking. After experimenting with several different ideas and some abortive prints, I decided to cut the model across the middle and print it in two halves. Finding the best place to make the cut took several attempts but the final solution turned out to be the obvious one - cut exactly between the two big toes at the contact point.

Here is the model in Cura, ready for slicing. I used MeshMixer to generate the support structures because it allowed me to place them exactly where I needed them.


And here is the same view in Repetier Host, showing the Gcode file ready for printing.


OK, it's finished! I had to reprint the leg because the toes broke on the first try due to poorly positioned supports. After cleaning them up in Blender I had another go and it came out much better.
I printed in PLA and after cleaning up the support material I used superglue to join the two halves together.

Straight from the printer, supports still attached.


Front view, reproducing the original pose.

Viewed from the back.


There are some nasty blemishes left behind where the supports were removed and I've also noticed that I'm getting more Z-banding on the models than I used to see. Maybe time to think about tuning up the printer again.

Saturday 22 March 2014

Arch

Pinterest continues to be a great source of inspiration for my 3D printed nude figurines. The latest photo I found was this one, which, according to Google image search, was originally taken by L M Hughes.


It's a fantastic pose and a great challenge for a 3D printer.
I set up the pose using my favourite software and then went through the cleaning process, which is now getting quicker as the routine becomes more established. These are the steps I now go through:

  • Export the model as an OBJ file keeping the body and hair as separate objects
  • Import the model into Blender - the hair and body should be separately selectable 
  • Hide the hair temporarily
  • Select the body and go into point edit mode
  • Pick any vertex and then use Ctrl-L to select all linked vertices. Now press H to hide these points. This is a really easy way to identify any internal components
  • Select all of the eyelashes,teeth, gums and tongue and delete them
  • Keep the front of the eyes but delete the iris, lens and non-visible parts.
  • Use Alt-H to un-hide any hidden vertices
  • From the side view, select all the points in the bottom 1-2 mm of the model and scale to zero on the Z axis - this makes a flat base for the model
  • Now in object mode, hide the body and un-hide the hair
  • Add a high density icosphere mesh so that it surrounds the hair
  • Shrink-wrap the sphere around the hair target using the negative projection setting so that all the points move towards the centre until they meet the hair surface
  • Now delete the hair object and keep the sphere which has taken on the shape of the hair, but in a single closed mesh
  • Un-hide the body and save the body and hair together as an STL file
  • Open the STL file in Cura
  • In the Expert settings, use FixHorrible-Type B - this removes any internal holes and prints much more reliably
  • Turn on the default support settings
  • Use Z-lift on retract to stop the nozzle from catching on edges as it travels from area to area
  • I printed at 0.15 mm resolution with some fairly aggressive cooling from a new fan mounted on the hot-end

Here is the printed model with the support structure still attached.


And here it is with the support removed.


Even the top of the foot came out well thanks to some fairly aggressive cooling.


Wednesday 5 March 2014

The problem with some meshes

The biggest problem I face with many character posing tools as that the shoulders and hips look horribly distorted when fully flexed. Look at the left shoulder, hip and knee in the picture below, to see what I mean.


I now believe I may have found a solution for this. To make the mesh deform most naturally, I believe the resting position should be halfway through the range of movement for every joint in each direction. 

The problem is that most meshes are designed with the body in a 'neutral' T or A shaped pose - but that does not provide the full range of joint movement.

Think about the hip. Its greatest range of movement is forward flexion. From standing you can only bend your leg backwards about 30 deg, but you can bring your knee forwards, right up to your chest. To provide the full range of movement, why not design the mesh with the neutral position being half-way between these two extremes?

Ever wonder why the skin on your knees and elbows is so wrinkly? It's because you need lots of spare skin to allow the joints to flex fully, otherwise it would tear. The neutral position for elbows and knees is bent to about 90 degrees.
I would like to see a mesh designed to look good with the joints all positioned mid-way through their range of movement, with the hope that when the arms are fully raised or the hips are fully flexed, you don't get those horrible distortions. I have moved the right arm and leg in the picture above so that the joints are all mid-range.

Sunday 2 March 2014

Best supporting act

Now that I have a delta printer that can make taller prints, I decided to go back and revisit one of my earlier designs, Pensive.

This is a model of a nude woman standing upright in a thoughtful pose. The problem I had originally was that when I printed it small enough to fit in the printer, some of the small features like the fingers just wouldn't print. 

My previous solution was to print the model in two halves and weld her back together afterwards. One beneficial side effect of doing this was that I could make the cut at exactly the point where the tips of the elbows start in the upper half. Now that I was able print the full height of the model in one go I realised I was going to need a different strategy for supporting the arms. I also took the opportunity to change the hairstyle for something a little more voluminous and impressive.


 Without a support structure below the elbows, the extruded filament would simply fall to the bed when the nozzle reached that point.

One method would be to turn on the support feature in the slicing software but this rather crude method would result in a large amount of additional material being placed in many unnecessary areas.

Instead I decided to try the latest version of Meshmixer which allows individual pillars to be placed, manually or automatically, underneath the areas that need supporting.


I didn't like the positions of the automatically placed supports and so I opted to add my own scaffolding exactly where it was needed.

Here is a picture of an early test piece, 175 mm tall with a rather excessive amount of support material still in place.


Having proved that the method worked, I decided to go for a larger version 250 mm tall. This one worked even better. Printed in white PLA at 0.2 mm layer height taking 19 hours.


 I think that this method of support placement could be extremely useful in future and should make it  possible to print many other difficult poses.


Tuesday 25 February 2014

Kayleigh

One of the most beautiful poses I've seen recently on Pinterest was this one.


It had been repinned many times, so clearly other people agreed with me, but wasn't being properly credited. I used Google image search to track down the original version and discovered that the model is Kayleigh Lush.


I used my favourite character modelling software to emulate the pose (not exactly right, but good enough to capture the spirit of the picture, I hope) and then exported an OBJ file. I then used Blender to correct the orientation and scale and to flatten the base and remove the eyelashes, before exporting an STL file.


Here is the screen capture of the 3D model in Blender.


This time I used Project Miller again to select the external surfaces of the model, then used Kisslicer to generate the gcode file with full support turned on and printed in white PLA from Faberdashery at 0.15 mm resolution. 

Another pretty successful print, in my view.


With hindsight, it might have been better to have sliced with Cura and used the expert setting called 'Fix Horrible' - type B, which closes all internal holes and deals much more nicely with limb overlaps. Maybe next time.

Monday 13 January 2014

Cicero D'Avila

I have continued in my efforts to make a good print of the sculpture inspired by the Cicero D'Avila pose in my previous post.


Firstly, I remade the arm pose, tipping the woman's head back to improve the angle of the face and prevent the arm support material from falling across it.


This smaller version was printed on a delta printer in red PLA and showed that the model was printable although the underside of the arms is still very ragged following removal of the support material.

At this point I decided to change the arm position again, opting for a more vertical configuration that would hopefully avoid the need for any support material. 


Once again I decided to shortcut the process of making the model printable by using Project Miller to re-skin the mesh. Unfortunately, the model still had some errors which resulted in malformed Gcode when I tried to slice it with Slic3r and Kisslicer. This time I found that the new version of Cura (I'm using 13.12) offered some very useful advanced options including Combine Everything (Type B) under the Expert settings. The Gcode looked very good in Repetier Host so I set off the 12 hour print and this time I finally managed to produce a model that does justice to the sculpture I had planned.

Here's a timelapse video made inside the printer using Octoprint.


Some detail shots taken before the smoothing process.


And after smoothing in acetone vapour to remove the print lines and support blemishes.


One more video of the finished product.