Right, I think it's time for an Entiresia original.
I have a pose in mind and I'm going to have a go at creating it from scratch. I want the woman to be relaxing casually on her side, head propped up on one arm with the other hand reaching forwards and resting on the floor. I also want the knees tucked up a bit and both feet resting on the floor.
I started by positioning the right arm and then the head and neck. Next, I added a bit of forward bend, lateral flexion and slight rotation of the spine, to make the right hand side form a straight line, as if lying on the floor. The model was then rotated almost 90 degrees to the right, into the reclining position. The breasts were repositioned slightly to show the effect of gravity pulling from the right side and then the legs and the left arm were placed in contact with the floor.
This pose was also designed with 3D printability in mind, so should require a minimum amount of support. I did the slicing in Cura with my usual setting of 0.15 mm layer height and 25 mm/s print speed, although I think I could have gone a bit faster. The steep angle on the left forearm caused a bit of curling of the leading edge so I had to use a small amount of cooling fan (sometimes it helps, even with ABS) to prevent the nozzle from crashing into it. I took the temperature up to 240C this time and was very pleased to discover that this print has absolutely no sign of splitting anywhere.
After a bit of sanding to clean up the support marks I took this series of photos, making the most of the low morning sun - vapour smoothing to follow soon, I hope.
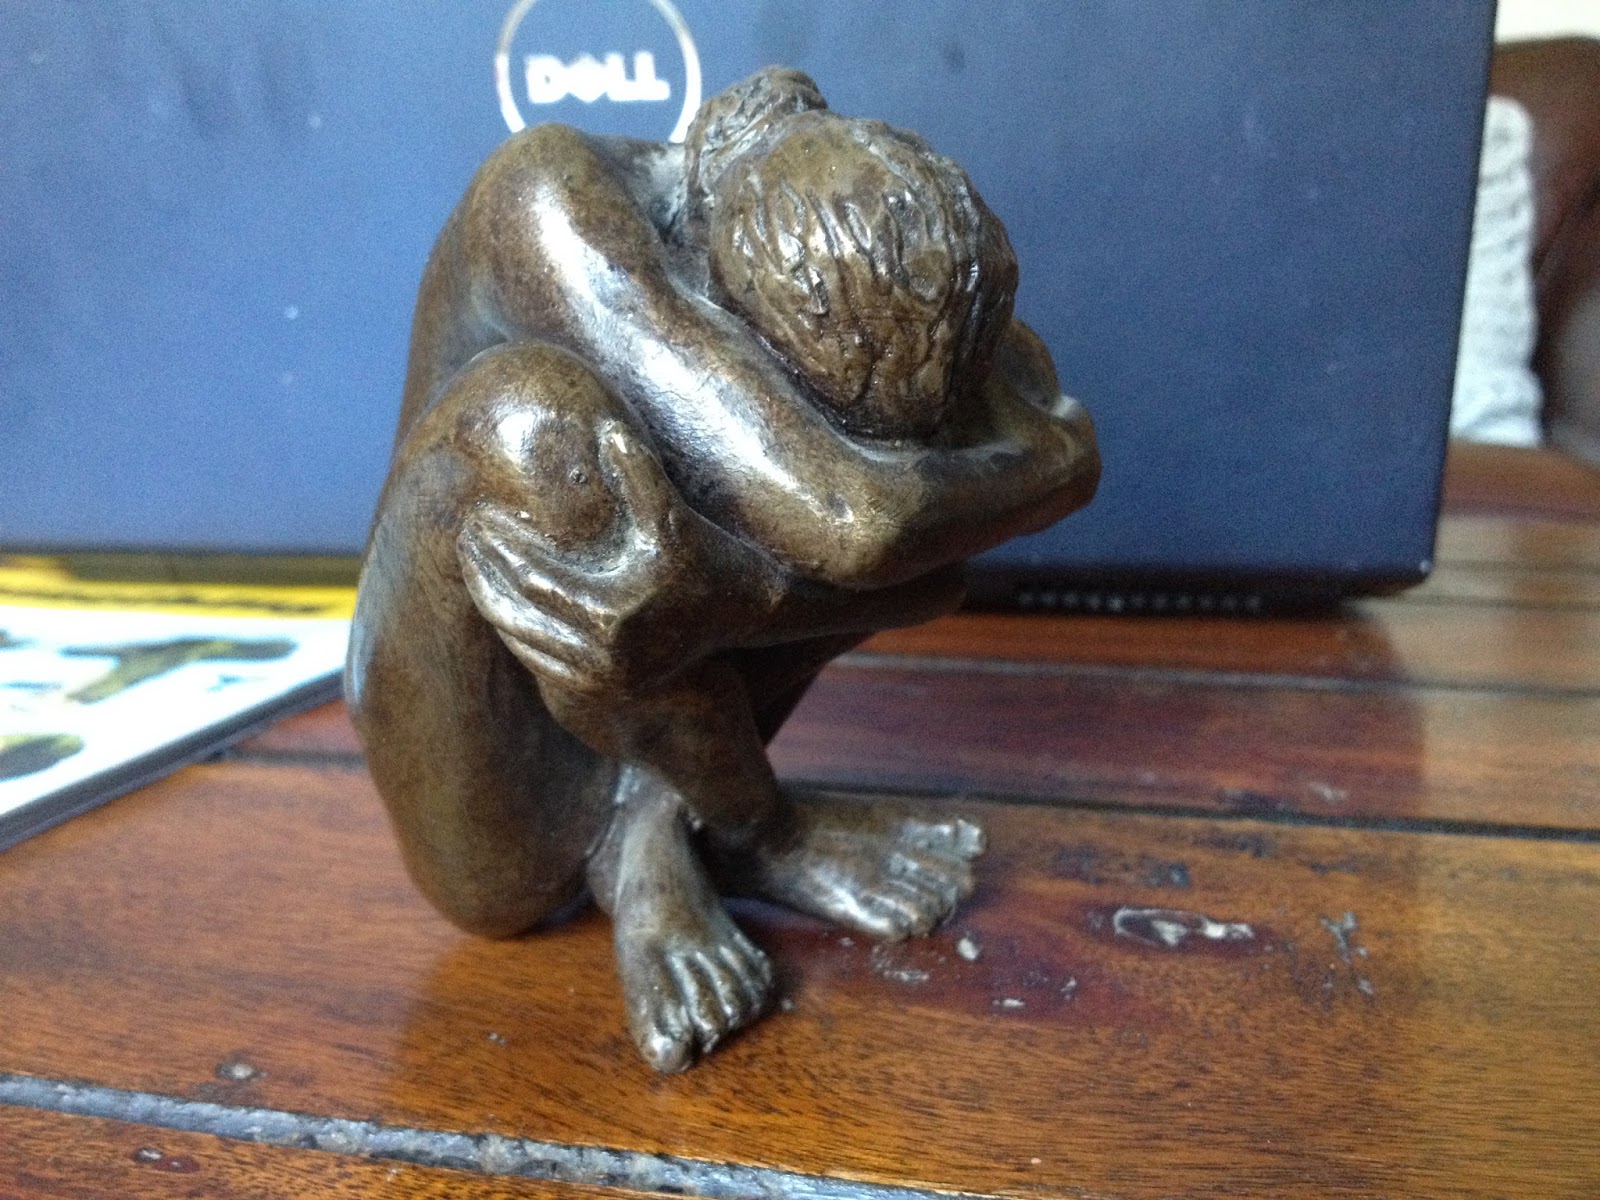
I have a good friend who we visited recently, who has many fine pictures and sculptures in her house, many of them art nudes. One small sculpture on her mantelpiece caught my eye as it looked both original and printable.
Here is the STL file, processed in the usual way, ready for printing.
I used Cura for the slicing, both for its support and ability to fix overlapping meshes (Project Miller has now ceased to function!) I decided to print in black ABS and use vapour smoothing on the finished print. This version was printed inside the heated chamber at a slow 25 mm/s and 235C. There is one small split across the back which I hope will improve with acetone treatment. Before support removal
After support removal
I have another project in the pipeline (well, in the printer actually), so I'll wait until that's finished and then start a smoothing session on both of them.
Pinterest continues to be a great source of inspiration for my 3D printed nude figurines. The latest photo I found was this one, which, according to Google image search, was originally taken by L M Hughes.
It's a fantastic pose and a great challenge for a 3D printer. I set up the pose using my favourite software and then went through the cleaning process, which is now getting quicker as the routine becomes more established. These are the steps I now go through:
Export the model as an OBJ file keeping the body and hair as separate objects
Import the model into Blender - the hair and body should be separately selectable
Hide the hair temporarily
Select the body and go into point edit mode
Pick any vertex and then use Ctrl-L to select all linked vertices. Now press H to hide these points. This is a really easy way to identify any internal components
Select all of the eyelashes,teeth, gums and tongue and delete them
Keep the front of the eyes but delete the iris, lens and non-visible parts.
Use Alt-H to un-hide any hidden vertices
From the side view, select all the points in the bottom 1-2 mm of the model and scale to zero on the Z axis - this makes a flat base for the model
Now in object mode, hide the body and un-hide the hair
Add a high density icosphere mesh so that it surrounds the hair
Shrink-wrap the sphere around the hair target using the negative projection setting so that all the points move towards the centre until they meet the hair surface
Now delete the hair object and keep the sphere which has taken on the shape of the hair, but in a single closed mesh
Un-hide the body and save the body and hair together as an STL file
Open the STL file in Cura
In the Expert settings, use FixHorrible-Type B - this removes any internal holes and prints much more reliably
Turn on the default support settings
Use Z-lift on retract to stop the nozzle from catching on edges as it travels from area to area
I printed at 0.15 mm resolution with some fairly aggressive cooling from a new fan mounted on the hot-end
Here is the printed model with the support structure still attached.
And here it is with the support removed.
Even the top of the foot came out well thanks to some fairly aggressive cooling.
One of the most beautiful poses I've seen recently on Pinterest was this one.
It had been repinned many times, so clearly other people agreed with me, but wasn't being properly credited. I used Google image search to track down the original version and discovered that the model is Kayleigh Lush.
I used my favourite character modelling software to emulate the pose (not exactly right, but good enough to capture the spirit of the picture, I hope) and then exported an OBJ file. I then used Blender to correct the orientation and scale and to flatten the base and remove the eyelashes, before exporting an STL file.
Here is the screen capture of the 3D model in Blender.
This time I used Project Miller again to select the external surfaces of the model, then used Kisslicer to generate the gcode file with full support turned on and printed in white PLA from Faberdashery at 0.15 mm resolution.
Another pretty successful print, in my view.
With hindsight, it might have been better to have sliced with Cura and used the expert setting called 'Fix Horrible' - type B, which closes all internal holes and deals much more nicely with limb overlaps. Maybe next time.
I have continued in my efforts to make a good print of the sculpture inspired by the Cicero D'Avila pose in my previous post.
Firstly, I remade the arm pose, tipping the woman's head back to improve the angle of the face and prevent the arm support material from falling across it.
This smaller version was printed on a delta printer in red PLA and showed that the model was printable although the underside of the arms is still very ragged following removal of the support material. At this point I decided to change the arm position again, opting for a more vertical configuration that would hopefully avoid the need for any support material.
Once again I decided to shortcut the process of making the model printable by using Project Miller to re-skin the mesh. Unfortunately, the model still had some errors which resulted in malformed Gcode when I tried to slice it with Slic3r and Kisslicer. This time I found that the new version of Cura (I'm using 13.12) offered some very useful advanced options including Combine Everything (Type B) under the Expert settings. The Gcode looked very good in Repetier Host so I set off the 12 hour print and this time I finally managed to produce a model that does justice to the sculpture I had planned. Here's a timelapse video made inside the printer using Octoprint.
Some detail shots taken before the smoothing process.
And after smoothing in acetone vapour to remove the print lines and support blemishes.
At last, I feel inspired to start work on a new piece. I've continued to collect photos of interesting nude poses on my Pinterest page and recently found a couple of pictures that I think might work well together.
The first piece is a marble sculpture by Cicero D'Avila. The torso and legs will prove an interesting challenge to reproduce, but the hands are not ideally placed for 3D printing because of the way the fingers are pointing down.
The second picture was a recent find which I think I can use to create the arm pose for my new design. I couldn't find information about the photographer - if you know, please pass the details on and I'll credit them.
Creating the pose wasn't too difficult and took me only a couple of hours. Project Miller is a fantastic new tool in my toolkit which hugely simplifies the process of making a 3D object printable. It can automatically wrap the model in a single manifold mesh which eliminates all of the problems with hair, eyes, teeth and folded limbs, at a single stroke.
I then took the raw model into Blender and began the process of sculpting in some additional details in the hair.
The next step was to find the best way of slicing and supporting the model ready for 3D printing. this time I decided to give Cura a try. Cura is an extremely fast slicer written by David Braam of Ultimaker. When I'm evaluating a sliced model that needs support, I look for the right amount of support material with an adequate gap between the support and the model so that it will break away with the minimum of effort. My first attempt at printing this model, which I have named Cicero for convenience, used a light grey PLA and took over 8 hours to print. The lower half started well but sadly the head and arms are not as smooth and seem covered in a regular indentation. The pose looks great though and is definitely one I would consider using again.
I have just completed one of my best projects so far. It was inspired by another great Bruno Birkhofer photo called Body Language.
I took special care with the pose modelling to capture the lines as faithfully as possible, carefully placing the limbs as close as possible to each other without overlapping. I reused a short hair style of my own creation. Here is a screenshot of my version in Blender.
The next important step was deciding how to print it and what kind of support to generate. I used Kisslicer to generate the printer files again, because although a new version of Slic3r has just come out with supposedly much improved support generation, I haven't had time to test it yet. I decided to to make one change from the settings I used for the previous Birkhofer print and that was so go up from Medium to Dense for the support layer, just to see what would happen. The other genius idea I had was to turn the print vertically for printing, which changed the position and amount of support material required. If I had printed the model exactly as it appears in the picture above, all of the chest and head would have need support underneath it. By rotating it to a much more vertical angle almost none was needed in these areas.
I was so impressed by the new settings that decided to make another video of the support removal process. You can see how my preferred tool is a flat bladed screwdriver which breaks the weak bonds between model and support with less risk of damage to the delicate areas. The support was certainly more dense than before and, in my view, held the model better whilst still coming away cleanly.
.JPG)
.JPG)
.JPG)
.JPG)
.JPG)