Showing posts with label Blender. Show all posts

Saturday 3 August 2013

Golden Sun

I had this idea that I wanted to try and print a version of Sun Worship using gold filament. I had read some good things about the gold PLA from Faberdashery so I decided to give it a try.

First though, I decided to spend some time rebuilding the pose from scratch. I've also been getting better at using the Sculpt tool in Blender and wanted to have another go at a better hairstyle. Here she is in Blender.


Getting the hands and feet to sit absolutely flat on the floor really helps to keep the print stable.
Good adhesion to the print bed is vital when printing tall sloping limbs without support. Here you can see the point just before the arm connects to the shoulder - perfectly level and no warping thanks to a cooling fan.


The final print came out even better than I had hoped for. My recent upgrades to the nozzle and belts seem to be giving me very nice smooth prints now. And of course, being PLA, acetone vapour baths are not an option - this glossy finish is straight off the printer.


Tuesday 18 June 2013

Body Language

I have just completed one of my best projects so far. It was inspired by another great Bruno Birkhofer photo called Body Language.


I took special care with the pose modelling to capture the lines as faithfully as possible, carefully placing the limbs as close as possible to each other without overlapping. I reused a short hair style of my own creation.

Here is a screenshot of my version in Blender.


The next important step was deciding how to print it and what kind of support to generate. I used Kisslicer to generate the printer files again, because although a new version of Slic3r has just come out with supposedly much improved support generation, I haven't had time to test it yet.

I decided to to make one change from the settings I used for the previous Birkhofer print and that was so go up from Medium to Dense for the support layer, just to see what would happen.

The other genius idea I had was to turn the print vertically for printing, which changed the position and amount of support material required. If I had printed the model exactly as it appears in the picture above, all of the chest and head would have need support underneath it. By rotating it to a much more vertical angle almost none was needed in these areas.


I was so impressed by the new settings that decided to make another video of the support removal process. You can see how my preferred tool is a flat bladed screwdriver which breaks the weak bonds between model and support with less risk of damage to the delicate areas. The support was certainly more dense than before and, in my  view, held the model better whilst still coming away cleanly.


Support removal video


Before and after smoothing


Finished print


Tuesday 4 June 2013

Recline further

I decided to persevere with Recline and try to fix some of the problems.

Following an invitation from Sublime to try his calculator (see the comments in Recline), I learned that my setup could work better at 0.2 mm layer height if I increased the extrusion width from 0.4 to 0.48 mm. That should certainly help to improve layer bonding somewhat.

I also reasoned that the delamination in the first print had been caused by excessive part cooling with the fan. I know, I know. ABS isn't supposed to need a cooling fan but I still believe that with steep overhangs it just prints a bit better with one; I just had it turned up a bit too high.
The next problem to work on was the fingers. I started another couple of prints and both times the fingers failed again. Something different was going on here.


I thought about this for a long time and eventually came up with three ideas for possible solutions.
Firstly, the way that I had splayed the fingers out made the overhang angle more than 45 degrees. Changing the pose slightly to make the fingers more vertical should help.
Secondly, I had changed the support gap setting in Kisslicer from 0.5 mm to 1 mm to try and make it easier to break away; I suspected that this was actually making the support less supportive, so I put it back to 0.5 mm.

Finally, it dawned on me that the only thing supporting the fingers was the weak interface layer attaching them to the raft. This hadn't been a problem with Curl because there were relatively large areas attached to the raft but this print was quite literally clinging on by its fingertips, and in the end the lateral drag of hot plastic from the rapidly moving nozzle was proving too great for the weak bonds. The solution for this print was to abandon the raft and find a better way to get the fingertips to stick to the bed. 

One option I considered was to print the model on a plinth. This would provide the strongest and most reliable base but wasn't really in keeping with the rest of the series so I decided to keep it in reserve. 
Eventually I resorted to my favourite method which has worked well in the past. I went back into Blender, opened the model in point edit mode and used 'Box select' to highlight all the points in the bottom millimeter of the model and then used Scale Z 0 (zero) to flatten the bottom of the model and finally moved all the selected points up a little to the most natural position.
A liberal splash of ABS juice on the printbed and I was ready to have another go.

This time it went much better. No serious delamination at all and the fingers are looking much more solid. The left thumb appears to have shifted and reconnected at the base, but this should be relatively easy to repair.


Now I just need some time to do the support removal and acetone vapour bath.


Wednesday 22 May 2013

Recline

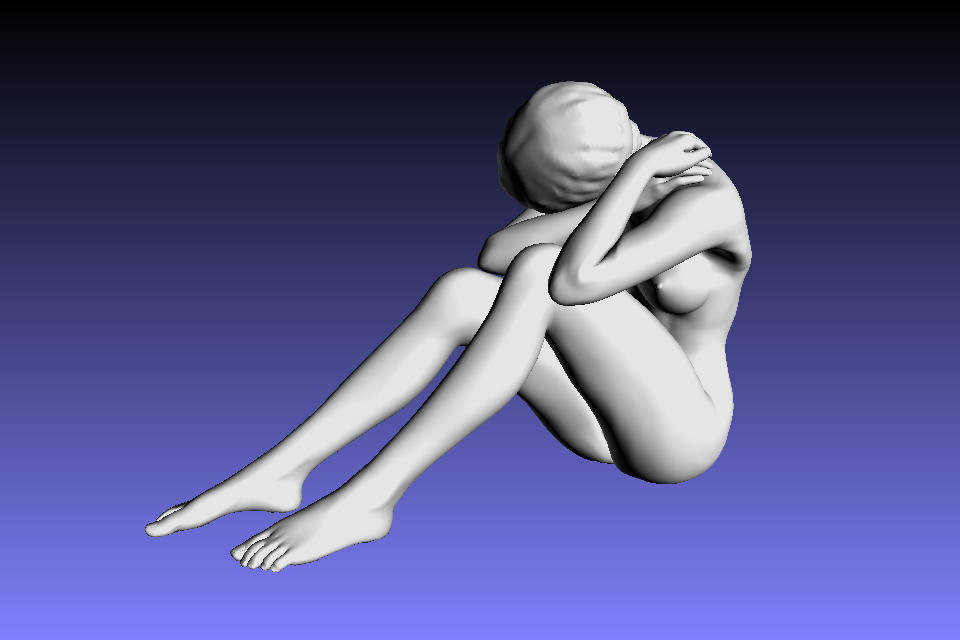
Here's my new project.  I've started a collection of potential sculptures on Pinterest and, having printed several curled up models, I fancied trying a more open, reclining pose like this one.  I have now discovered that this is one of the 'Square Nudes' series by Carsten Witte.


The amount of support material required should be fairly minimal although the steep angle under the upper back may need some.  Additionally, the palms of the hands are raised off the ground and will also need supporting. 
Another of the challenges will be to deal with the area where the thighs and calves will inevitably overlap after posing the model.

More to follow ...

Turns out that I still haven't quite got this 3D printing lark completely sussed yet. The modelling went quite well. I even broke with tradition and tried leaving the mouth open a bit to allow the front teeth to show. This, in turn, meant having to devise a different technique for closing off the open edges in the mouth area.


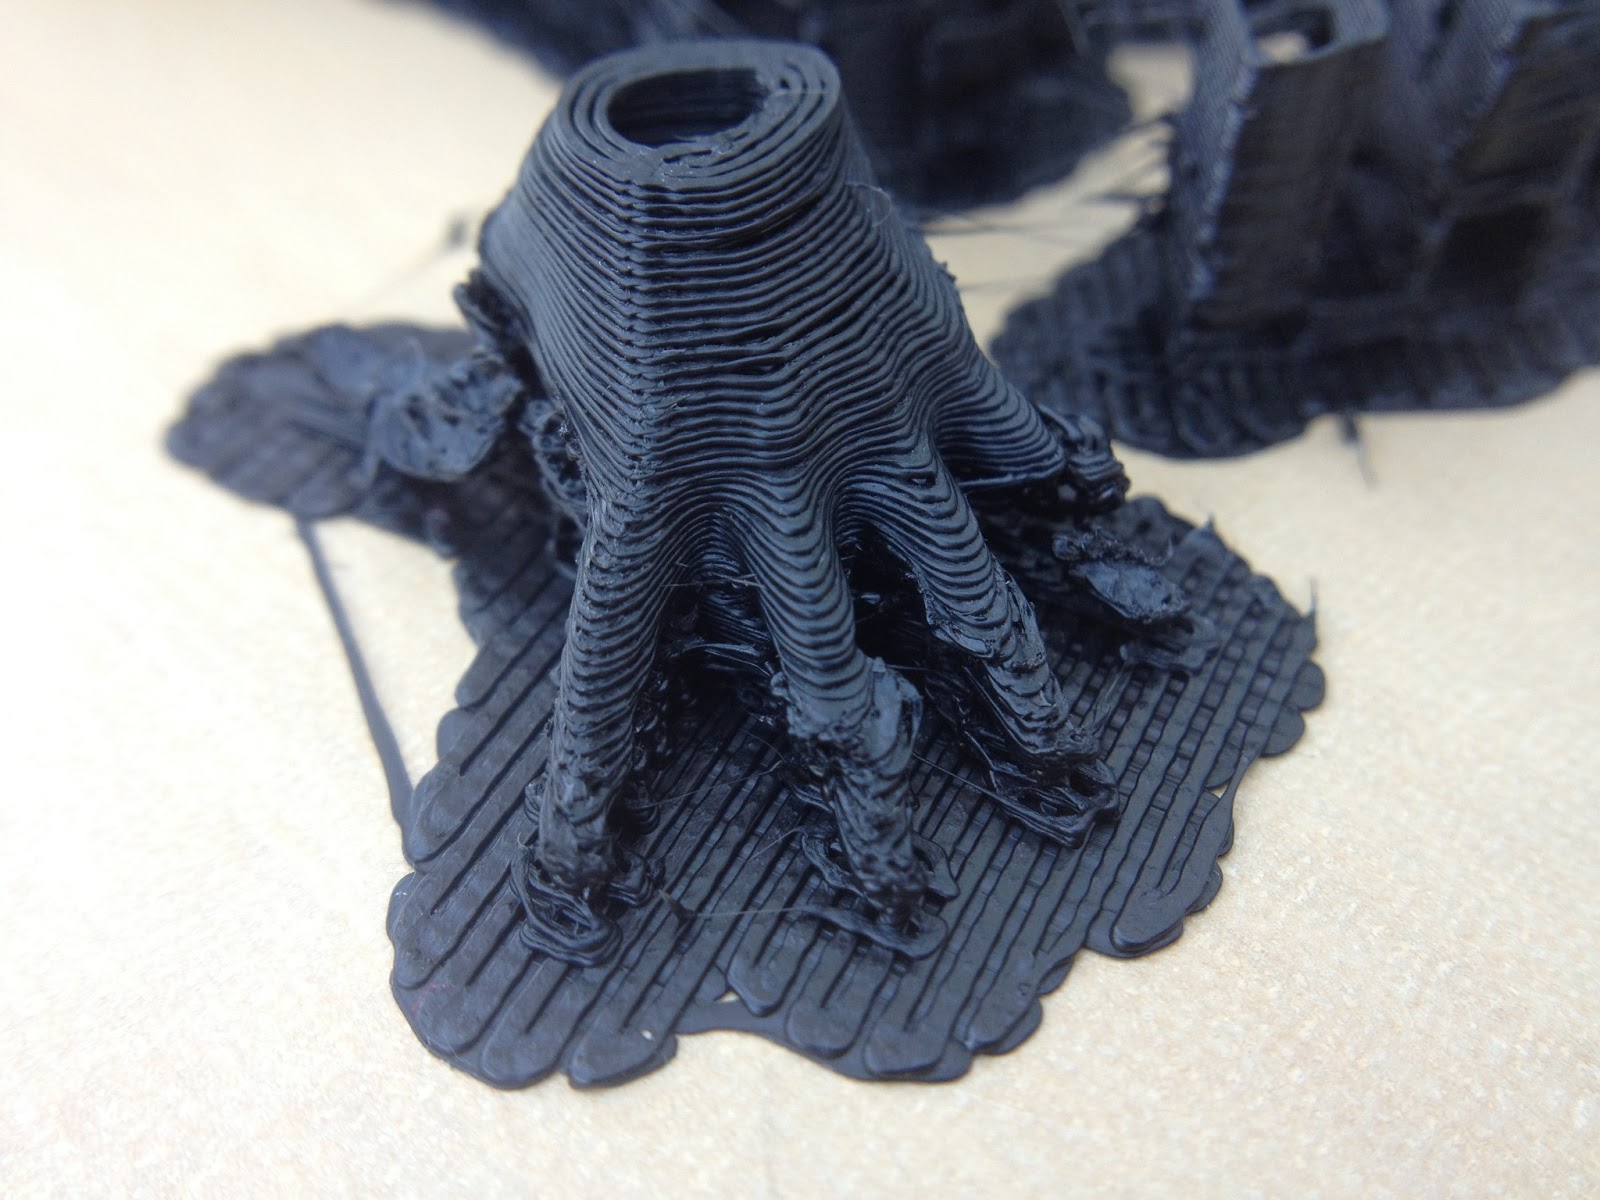
As usual, I opted to use Kisslicer to generate the gcode because I still find that it produces the best support material. The problems started when I began to print. In spite of the fact that I was using the same settings as I have for all my other prints (ABS at 240C, 0.2 mm layer height, 0.4 mm line width), the extrusion seemed thinner than usual and the inter-layer bonding was poor. The model finally appeared from the build chamber with several large cracks including a complete break in one of the arms.


The other major problem was that the fingers appeared to be poorly formed and looking as though they might come away with the support material. I haven't tried removing the support yet, due to lack of time, but I really don't hold out much hope for saving this print. 


One of the factors that has changed is my new hot end which has a 0.4 mm nozzle, whereas my previous one had a 0.5 mm diameter hole. Slic3r includes a place to enter the diameter of your nozzle but apparently Kisslicer does not.  I have never quite understood the logic of this, so I don't really know whether it could be a possible factor in explaining the latest failure.

I'll probably give it another try and maybe just turn up the flow rate a bit.

Saturday 30 March 2013

Curl

I decided to have a go at reproducing the pose in Jian Xu's picture shown at the bottom of my last post. Tricky parts included getting the fingers into the correct position, particularly since it seemed to push the right elbow into odd places, and dealing with the deep mesh overlap where calves met thighs and thighs met trunk.

I'm still struggling to get good quality solid hair and I don't always like the models looking bald! This time I used Sculptris to fashion a short hair style starting from a simple sphere. It's not great but it kind of works.

Here is the cleaned up version in Blender beside the reference picture.


Metamorphosis looked beautiful in the translucent blue but, being made of PLA, I couldn't use the acetone vapor bath to smooth the surface. PLA isn't soluble in acetone. I knew that I wanted to have a smooth surface on Curl, so I thought I would try printing a copy in black ABS.

My first attempt was sliced in Slic3r 0.98 but again I was disappointed with the way it generates support structures, so I abandoned that print and sliced again in Kisslicer. This version looked much more promising and I have learned that the initial raft is an indispensable feature for supporting this type of model.

Here is the model on the print bed and in close up, showing the support structures (under LED lighting).


Here is the bottom section of the support material after it was peeled away from the model. I am still impressed with how well the support separates from the model given that they are both made of the same material.


And here is the final version after processing in acetone vapor.


Friday 15 February 2013

Sascha

I love this striking photo by Sascha Hüttenhain and I wanted to use this as the inspiration for a new sculpture.

I had to use a bit of artistic licence to create a pose that would capture elements of the photo but remain printable on my 3D printer.

Here is the digital version of the pose that I wanted to try and print.


Capturing the Sascha Hüttenhain pose

Viewed from the other side

For the 'Pensive' sculpture, I had created a long hair style that would sit comfortably on the woman's collar bones, avoiding another potential printability issue. However, this model is holding her head sideways, so I knew that a long hair style wouldn't work.

Hair is a real problem when using the models in 3D posing software. It usually consists of multiple flat layers combined to give the illusion of depth. This may work for 2D images, but 3D printing demands real depth with solid models and the standard hair add-ons don't work.

One of the most useful techniques I have tried, is to export a hair style as an .OBJ file, import it into Blender and then use the Shrinkwrap modifier on it. It isn't a completely automatic process yet, because it still needs a fair degree of tweaking, but it is much better than attempting to print the original hair model. The finished hair object can be combined with the rest of the body with a Boolean Union join to create a single watertight mesh which the slicing software can cope with.

This model presents several new challenges. The head is tilted sideways; the legs are at a shallower angle; the left elbow is beside the knee, not resting on it; the hands are being held horizontally, one above the other.

All of these factors led me to the conclusion that I would have to turn on automatic support in my slicing software. I would also have to print with ABS plastic because of the way that the support elements will have to break away from the model, leaving the minimum of scarring. I fully expect to have to do some post-processing work after printing this model.

I generally use Slic3r for turning my 3D models into printer instructions, but I don't find it that good at generating support material. Recently, I have had more success with using Kisslicer when I need good support material. Printing models with a small footprint, and this includes support material, is sometimes more reliable if it is laid down on a printed raft, rather than directly onto the printer bed. 

In Kisslicer, I turned on the Raft option and set the Support material density to medium.
I set the model height to 8 cm and the layer height to 0.2 mm, giving a total of 400 discrete layers.

Here is a close-up preview of the printer file rendered by the excellent printer controller software, Repetier-Host, showing the raft (under the feet), the support structures (under the legs) and the individual layers of the model.


Repetier-Host preview render

And here is the 3D printed version.


Printed in grey ABS at 240°C, 0.2 mm layer height, waiting for support material to be removed.


And now, following removal of the support material and surface blemishes.


Removing the support material

Video

Tuesday 5 February 2013

Welcome to 3D Printed Nudes

Home 3D printer ownership and use has exploded over the last couple of years. These small but powerful machines are capable of creating solid objects by melting plastic filament and depositing it precisely in thin layers, building strong, solid shapes that can be both functional and aesthetically pleasing.
Printers can be built at home from a kit for about $750, or purchased ready to use for about $2000.
Almost all of the software needed to create and print digital 3D models is available as open-source freely downloadable files.

The 3D printer in action


Why print nude sculptures?

  • Classical sculpture has used the nude human form as subject matter for thousands of years. Humans innately find beauty in representations of the human form.
  • The smooth, subtle, sensuous curves of a naked body present a real challenge for machines that are typically used for making mechanical objects based on digital models.
  • Many great statues can be captured for printing using an ordinary digital camera and a free online service such as Autodesk 123D Catch.
  • 3D modelling software already offers the capability to create digital compositions that can be exported in a printable format, but these files are not generally printable without extra work.
  • Adding clothing on top of the models, significantly complicates this process. Making printable nude sculptures is both pleasing and much simpler.

There are many challenges to be overcome and I aim to make this site a place for sharing ideas to improve printing quality as well as a way of sharing some successes and failures.

Here is a new sculpture called "Sun worship" that was processed in Blender to make it ready for printing.

Sun Worship - face detail


Sun Worship - hand detail


Sun Worship - feet detail


Sun Worship - with ear-buds for scale