Tuesday, 7 June 2022

Resin printing

Having resisted buying a resin printer for a long time, mainly because of the mess involved, I finally relented and bought myself an Elegoo Mars 2. The process is horribly messy and smelly and generally toxic, but the results are, as expected, in a different league.


Naturally, I revisited some of my recent designs and experiment with making resin prints. Here are a few of the results.


The level of detail is fantastic but the prints are on the small side. the tall model in the centre was printed in two halves and then welded together with a few drops of resin. It's actually quite hard to see the join!


Orson Carter

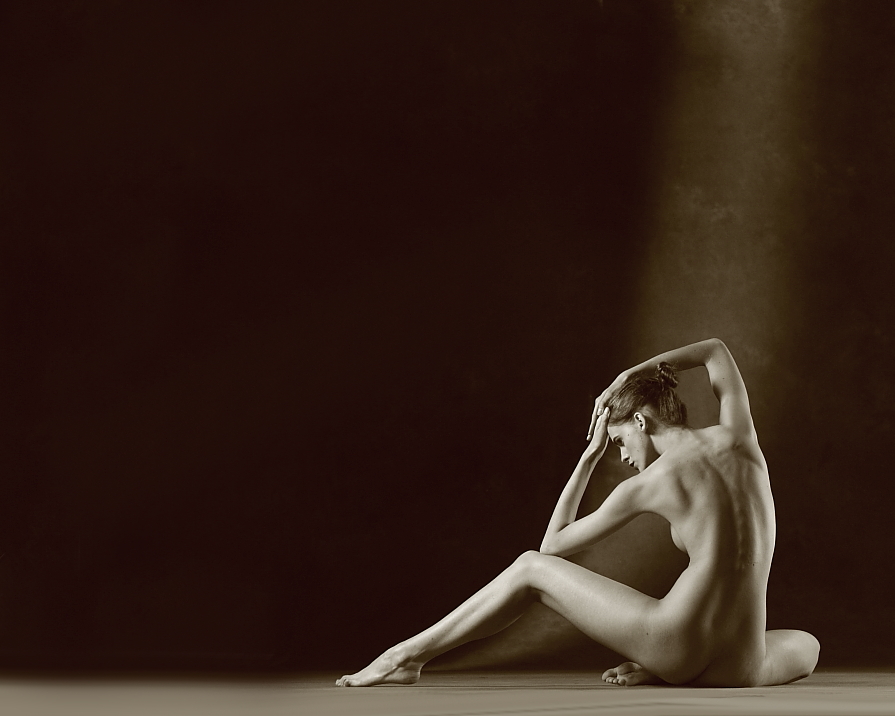
 It was seeing the photo of Ali Brooks in my last post that led me to the large portfolio of work by Orson Carter. Clearly a man after my own heart, he creates tasteful and always beautiful art nude photos that concentrate on a subtle 'shapes and shadows' style. I found many inspirational poses that would make great interesting challenges for 3D printed sculptures amongst his work, but after selecting my short-list of half a dozen favourites, the one at the top of my list turned out to be the one at the top of Orson's page as well. 

The photo of Melissa Tongue is another example of an implied nude, full of diagonal lines, extreme twists and wonderful light and shade.


Creating the pose in Daz Studio required turning off the 'range-of-motion limits' for many joints, but eventually I was able to achieve this 3D representation of the photo. I did make a slight modification to the position of the left hand so that the chin and tip of the nose would be supported.


Thursday, 10 June 2021

Ali Brooks

I'm usually on the look out for interesting art nude poses and when I saw this photo by Orson Carter featuring Ali Brooks, I knew it would make a great sculpture.


 I used a new Daz 3D model to recreate the pose and then tried creating some 3D rendered images in different settings. I couldn't find an accurate version of the hairstyle that worked, at first, so used a nice short style as a temporary alternative.


I decided to have a go at sculpting my own version of the braided pony-tail hairstyle using Blender, using Ali's photo as a guide. I combined the hair with the rest of the model and then converted the 3D mesh into a printable file using the same workflow that i described in my last post.
I was very pleased with the way it worked out and so I tried a mini 3D print in Satin PLA to accompany the small test print from my last post, 'Triangle'.


Finally, I completed a full-size print in a shiny, copper-coloured PLA to show off a bit more of the detail in this model.


Saturday, 2 January 2021

Triangle

I started this blog post a good 7 months ago but sadly, lost the whole article before it was published. This time I shall try to be more careful!

The idea for this original pose started out when I was reviewing one of my previous 3D prints called 'Balance' which, as the name suggests, had to be balanced quite carefully or it would topple sideways. The right knee was much too close to the left foot and, as a result, any slight shaking in the room would cause the statue to fall.


I decided to create a pose where the model would be resting on her right knee and the full length of the left shin, but with a triangular shaped base that would be much more stable. I thought it could work well if the model was reaching down with her right hand, to grasp the right foot, and reaching up with her left hand to touch her hair.
This is the pose that I came up with.

Notice how most of the features are oriented vertically rather than horizontally, which greatly reduces the need for extra support material. In fact, the only place that needed support adding was between the legs to support the genital area.


Tilting the head upwards prevents the chin and tip of the nose from needing any support. The bobbed hair-style is just the right length to rest on the shoulders and clavicles. The left breast is pulled upwards by the raised left arm, but the right breast is also sized so that the underside projects out at 50-60 degrees, which most 3D printers can cope with without needing support.

The hair looks great in these beautiful NVIDIA Iray renders within Daz3D, but there is no way they can be 3D printed without significant modification. My standard process for making 3D-printable models now flows like this:

  • Export the OBJ from Daz3D
  • Import in Blender - the body and the hair come in as separate objects
  • Clean up the body by deleting any unwanted mesh parts like the teeth and front layer of the corneas
  • Cut loops out of the inner eyelids and bridge across to the eyeball so that they are cleanly connected 
  • Completely remodel the hair by shrink-wrapping a fairly dense ico-sphere onto it so that it adopts the general shape of the hair, and then delete the original hair object
  • Use Blender's sculpt tools to improve the look of the hair by smoothing out spiky areas first and then adding details to make it look more realistic
  • Use a Boolean modifier to combine the new hair object and the body object into a single model
  • Export from Blender as an STL file
  • Perform any additional mesh clean-up as necessary using netFabb Basic, Windows 3D Builder (and, of course, the wonderful Project Miller if you can find a copy)
If all has gone well, you should now have a single, manifold mesh that will print with no errors.


The prints of this model worked really well in my twotrees Sapphire-S coreXY printer which now generates by far the cleanest set of prints of any that I own.


I liked the model so much that I decided to try printing a really large copy on my Creality CR-10S which has a build volume of 30x30x40 cm. The printer ran for 36 hours and used up half a kilo of metallic bronze coloured filament but the result was well worth the effort.


Sunday, 10 May 2020

Some catching up - Belovodchenko and Barbati

This blog has been a little neglected by me over the last year, but seemingly not by all of you, since the number of views recently passed the 150,000 mark. That's an awful lot of exposure! So, to say 'thank you' to all of my visitors, I wanted to share some of my recent creations with you.

I am still using Daz Studio to generate the posed models and export the OBJ files which means I'm afraid I still can't share the models with you. Increasingly, I am sculpting my own hair designs in Blender 2.80 and one day maybe I'll be able to create a full model of my own.

Since posting Tam, I was featured in an article for 3D-Tisk.cz  by Jan Homola - if you view it in a Chrome browser, Google translate does a good job of showing you the article in your own language.


My next project was inspired by another photo that looked as though it would need a minimal amount of support material to print. It comes from a series called Bodyscape Art by Anton Belovodchenko and I hope he won't mind me reproducing it here.


The pose was relatively straightforward to reproduce and, as expected, the print doesn't need any support material at all. The hair was completely hand-sculpted in Blender with the long ends curled up in the small of her back.


Overall, a very satisfying print that I am very pleased with.


The other sculpture I've been working on was inspired by a photo that I found on Pinterest by Niki Barbati. I can't find it now so I'll have to share the copy I found and hope that Niki likes my tribute enough to allow me to share it here.


I re-imagined this model with long hair that reached to the floor and predicted that, once again, no support material would be required to print it.

Here is the model I created using Daz Studio and Blender.


And here is the finished print in bronze PLA.


I liked this one so much that I printed a second copy in some new Fillamentum Mukha PLA which looks stunning.


So, that's now all up to date. I'd better start planning the next sculpture and looking for some printspiration.

Thursday, 3 October 2019

Tam

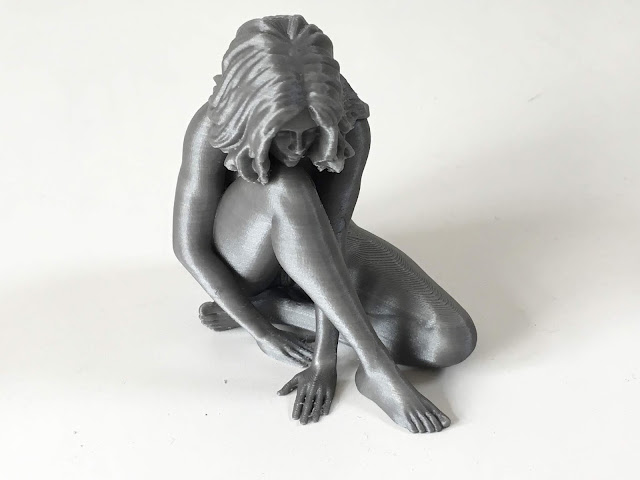
I've been wanting to sculpt this pose for a long time. I love the intertwined limbs and the opportunity to rest the chin on the knee to avoid using support material. I think the photo is by Tam Nguyen but I haven’t been able to locate it online. 


This type of pose is sometimes called an ‘implied nude’ because the breasts and genitals are not visible in the photo. This doesn’t usually affect the 3D version, of course, since a sculpture can be viewed from any angle, but in this case the only way to pose the figure is with the breasts compressed by the limbs.

My first attempt worked out OK as a pose, but failed as a 3D print because I tried to make the hair out of individual strands and the retractions just ground up the filament - should have guessed!

So I reverted to my tried and trusted formula of selecting a nice hairstyle and then shrink-wrapping and resculpting it in Blender.


I chose a nice metallic grey Fillamentum PLA filament for this print and sliced the model with Simplify3D. The print was made on my new Sapphire-S coreXY printer from twotrees adapted with a Flex3Drive extruder system. This keeps the print-head as lightweight as possible, giving some of the smoothest prints I've ever achieved.


I'm particularly pleased with how well the sculpted hair has printed on this model. It can still be improved further, though, and I'm working on that. The second version, lower down this page, has more detail sculpted in the flatter areas.


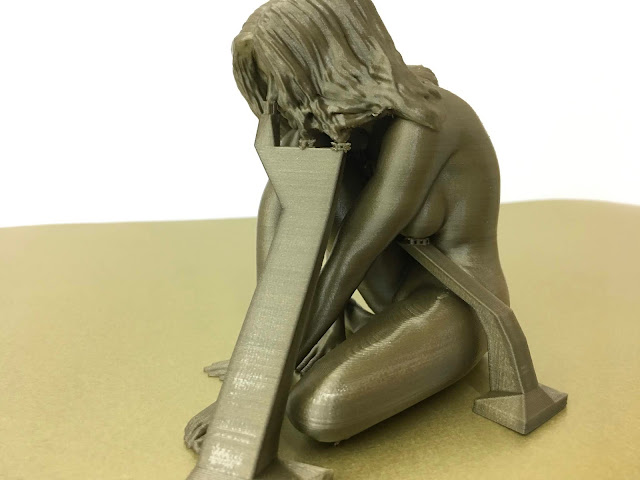
I had to add automated support material in a couple of places - under the left breast and the left front part of the hair. Unfortunately, this did leave some nasty scarring visible on the thigh and abdomen, which I was unable to hide. This set me thinking about other ways to add support.

It occurred to me that one way to avoid the ugly scars left after removing support material would be to try and construct a sort of platform sitting over the left leg on which the support could then rest. I fired up Blender and came up with these pieces of scaffolding.


The larger piece supports the nose and the dangling strands of hair. The smaller piece supports the underside of the left breast.


The innovation here is that I realised I could combine manually created scaffolding that projects into difficult to reach areas, with auto-generated support provided by the slicer to fill in the last few millimetres.
By using this approach, I can scale the model up to any size without having to worry about the support gap - it will always be perfect for my printer because the final gap is still decided by the slicer software.


Both support pieces broke away cleanly from the model leaving no scarring anywhere on the thigh or abdomen - a much cleaner result!
Notice in the picture below how the small chunks of auto-generated support sit on top of the large manually created blocks.


You can also clearly see here how much better the hair looks now with the extra detail sculpted into it.

Sunday, 6 January 2019

Shape and Form

A recent tweet from Rebecca Tun, who was the subject of one of my previous models, led me to the website of Max Operandi.   One of the Sensual photos I found there inspired me to create my next piece. It was this one called ‘Shape and Form’ (nice title!) which looked like an interesting challenge.


As always, the challenge was to use the pose controls in Daz Studio to copy the essence of this pose as accurately and artistically as possible and then create a printable 3D model.


Starting from Daz 3D Studio's Genesis 8 female as a base, I began by observing that model’s pelvis was rotated about the Y axis with the right hip flexed and internally rotated, whilst the left hip was extended sideways and backwards. I kept checking the position of the bent limbs in relation to the X-Y plane so that everything would end up making good contact with the floor.
Both arms had to be extended backwards, the left arm position being rather left to guesswork and imagination. I copied the extended fingers and bridging of the right hand and mirrored this position in the left hand.


With the exception of the horizontal area under the left inner thigh, the 3D model needed little or no support material. Keeping the breasts smaller and the head tipped upwards also removed the need for support material under the nose or chin. The hair was copied from the Katherine hair style and then sculpted in Blender as usual.

She printed beautifully, first time, in Fillamentum Vertigo Grey.

Many thanks to MaxO for giving me permission to share his photo here.